Group members: Dominique York, Sarah Suazo , Shameya Vass
NIGHT LIFE STAIRCASE
PROS:
- It assists the handicapped.
- It has two different methods of being powered.
- It has only been built for entertainment purposes, never for handicapped
CONS:
- we'll only do three steps which is not a full staircase.
- no handrails
__________________________________________________________________________________________________________
materials: 14 square feet of pine wood. Wood glue. Stainless Steel #7 x 1 5/8th " trim head screws
Problem It Will solve:
Our project is a light up staircase that also makes sound when somebody hits the first stair then the steps ahead will make sound or continue to light up, as you go up the stairs. For our project we'll be using modkit, the fablab (shopbot) and gimp.
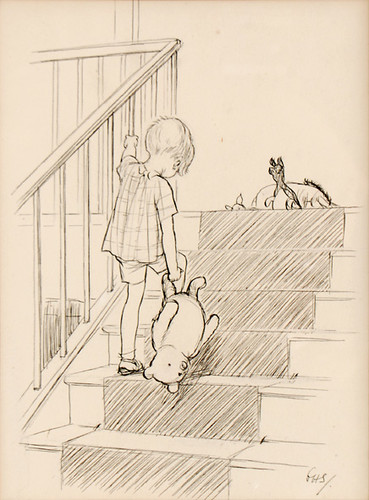
History: here is a blog post from a visually impaired man. Here he is talking about how difficult it is for him to go up and down the stairs our project would assist him by letting him hear when he touches a step. so going down wouldn't be so frightening.
Stairs and Steps
"As a blind man, some of my most frightening experiences have been on staircases and steps.
Believe it or not I had a class which took a whole day to teach me how to navigate these obstacles. The scary thing is no-one ever told me as a sighted person how to approach the obstacle of a blind man on a stair.
What I do as a blind man.
Going up a staircase for me is quite easy. I approach the staircase and find the bottom step with my cane. Having located this I move to the right to find the handrail.
With my toes against the first step and right hand on the rail I lift my cane and hold it loosely in order to allow it to swing. Lifting the cane I allow it to tap across the back of the first step then repeat this process to find the back of the second step.
This then gives me a fixed level to set my left arm. It tells me as I climb I have two steps ahead. As I climb the cane taps the back of each step in turn. When I reach the top the cane swings freely and tells me a landing is coming up or the top is reached.
Going down is much more complicated and frightening. I first need to find the top step then again move right to find the handrail. I hold my cane loosely to allow it to drop a step as I push it with my foot. All the time I need to lean backwards and slide my right fore arm down the handrail. This means if I fall I naturally fall backwards not head first, embarrassing but less dangerous if I miss my footing.I need to push my cane with one foot over the step and let it fall to the next tread. It is a slow process and actually pretty uncomfortable for me to do. Very tiring on a long flight of stairs or over several flights. In the end though I reach the bottom and am able to stand upright again."
Problem/Issue description:
These stairs will help the blind / deaf people get up and down the stairs, for blind people they will be using sound. When they hit the first step the rest of the steps will continue with making the sounds or the song until you hit the final step and alert you that you've reached the end. And for the deaf people there will be a staircase they'll be using lights , when you hit the first step the rest of the steps will continue to light up until you reach the final step , and the lights will automatically turn off.
___________________________________________________________________________________________________________________
July 9, 2012
Day 1:
Project Ideas:
- light up stairs
- portable microwave/oven
- portable chargers
_______________________________________________________________________________________________________________________________________________________________________________________________
July 10,2012
Day 2: We chose to do the light up staircase. It was the most benefital to the community and we could get it done in a timely manner.We sketched a plan of how the staircase prototype would look and we chose to use strips of EL lights to make each step light up. The Fabduino board would be used to play the music on the top step. We need to make a pressure sensor to make the EL lights light up when a stair is stepped on. The final stair case will contain 5 strips of EL lights each of the three steps. A fabduino Board on the top step which will let the user know it is the last and final step by playing music.
TO DO !!!!!
- Make a prototype staircase with card board first then use wood.
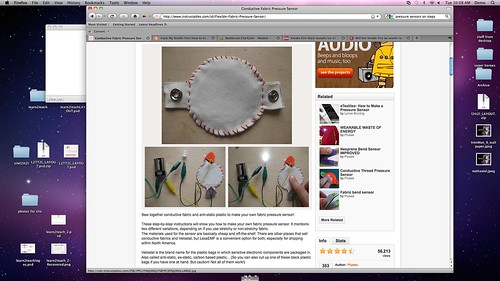
- Learn what it takes to make a pressure sensor.
- Find out who knows how to work in the shop block
- Answer:
_________________________________________________________________________________________________________________________________________________________________________________________
July 11,2012
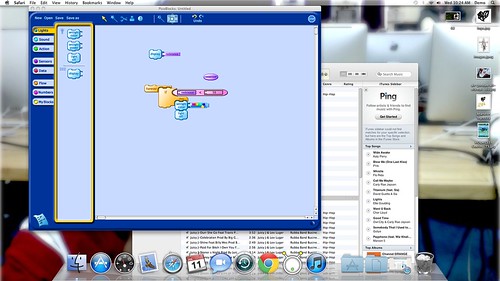
Day 3: We have a press fit stair case out of card board. We're in the process of learning how to create a pressure sensor that would turn the lights on when you step on the first step and turn the light off when you step on the last step. Below is a video that shows our 2 finished pressure sensors, programmed with pico. This is our prototyped pressure sensors.
http://www.youtube.com/watch?v=wHs5UDsYfWI&feature=g-upl
To Do !!!!!
- make home- pressure sensor
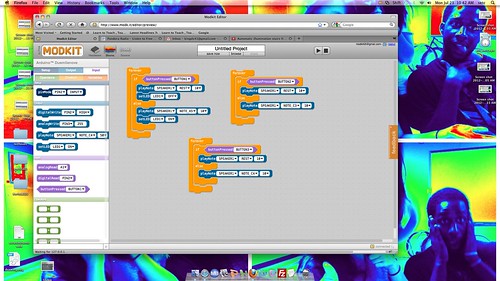
- transform pressure sensor/ resistor light from pico to modkit
___________________________________________________________________________________________________________________________________________________________________________________________
July 12, 2012:
Day 4: So far we've created two pressure sensors which will be on the first and last steps. once you step on to the first steps the staircase will light up, and when you step on the last step the lights will turn off. We programed our pressure sensor to do this exact task using pico. Pico is no longer a program we're using so we learned how to transform pico to Modkit.
TO DO!!!!!!!!!!
- Find out what kind of wood we need for our final project and where to buy it. ( Shameya )
- Find out what dimensions our wood would need to be. ( Sarah)
- Learn how to program the Arduino board ( Dominique with David's assistance)
- Make a functional prototype using the programming we have created using pico and transformed to modkit. add our pressure senors and light to our prototype stair case. ( Everyone)
- Figure out how to program the sound.
- make an acrylic stair prototype (shameya)
code for Arduino board: http://arduino.cc/en/Reference/AnalogWrite
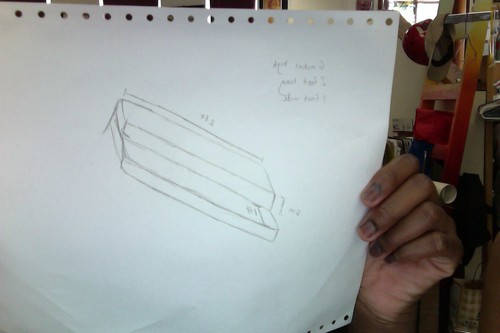
Scaled image of what the final stairs will look like
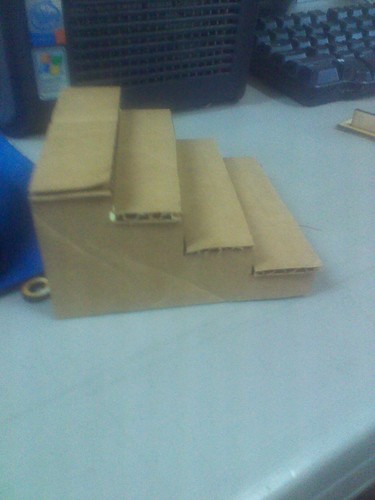
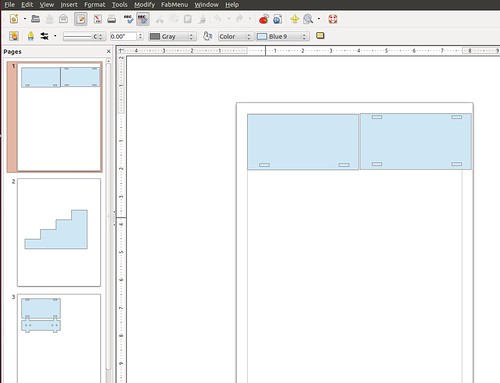
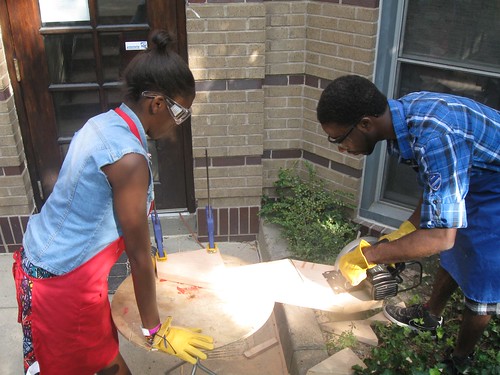
We used the fab lab to create press fit stairs that are durable and easier to manage
____________________________________________________________________________________________________________________________________________________________________________________________
July 16,2012
Day 5: We have a new prototype with the led lights plugged into the holes on the steps. We have wires connecting the LED located behind the staircase. We Programmed LED lights using Modkit also adding a pressure sensor. Below is a video of our programmed pressure senor with Modkit.
Video showing what we programmed on Modkit http://www.youtube.com/watch?v=9fPdZOYBnl0&feature=g-upl
To do list:
- make sides for the prototype (Shameya)
- program stairs with modkit
- incorporate sound
- find cheap wood (hickory)
- find someone to help make stairs ask Ed or Colin to help us use the shop bot
Lumber Liquidators is the place we can order the pine wood for the lowest possible price.
1. West Roxbury #1001
Hours:
Monday 8am - 6pm
Tuesday 8am - 6pm
Wednesday 8am - 6pm
Thursday 8am - 7pm
Friday 8am - 7pm
Saturday 9am - 4pm
Sunday 11am - 4pm
______________________________________________________________________________________________________________________________________________________________________________________________
July, 17 2012 : Day 6
TO DO TODAY:
-
re-wiring the prototype ( Shameya)
-
test out prototype using Modkit ( Everyone)
-
send Ed the questions we might have about Modkit (Sarah)
-
Call Lumber Liquidators to order wood ( Dominique)
-
Ask Donna to get the wood
Progress:
Today Shameya re-wired the prototype, the LED's all light up using a battery. Sarah Emailed the project description and the questions pertaining to Modkit to Susan. Dominique called Lumber Liquidators inquiring about the wood. We now know we need 14square ft of pine wood. It would cost $22.00. We spoke with Emond and he also taught us how to add music notes thru Modkit to play thru speakers for our staircase.
Complications:
We found out if we want music that is is not already programmed into Modkit we would have to go in our self and edit the code. Figuring out how to add a large pressure sensor to our final stair case that would be hidden is a challenge we are coming across. Also having an outlet plugged in to connect the Modkit shield is a problem.
Day 7 : July 18, 2012
Goals for Today:
- Edit the wiki add Susan's suggestions. (Dominique)
- figure out where the pressure sensor would be located and how to hide it on the steps. (everyone)
- Find out how big the wood can be so that we would still be able to use the shop bot. (Everyone)
- Paper full scale drawing of the final measurements of the steps. (Sarah and Dominique)
- Figure out what kind of speakers we would use on the final steps and where they would be located ( Shameya and Sarah)
- Program the speakers with more notes in modkit (Dominique)
- Fill out the materials list (Shameya)
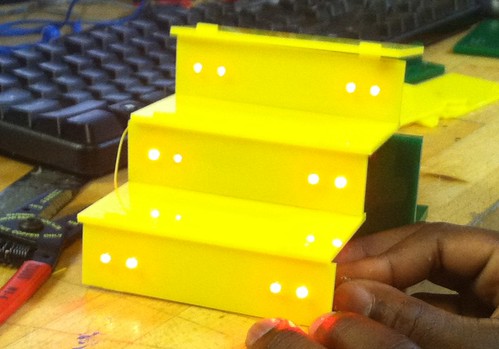
Progress: 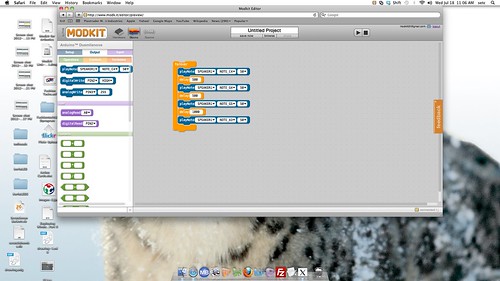 we also made a press-fit box in the fab lab to hid the speakers on the staircase.
_________________________________________________________________________________________________
complications: We still don't know how to add the pressure sensors to the actual steps. We need help with the dimensions someone to help us figure out if they are functional for steps and if we can actually make it in the shop bot.
___________________________________________________________________________________________________________________
Day 9: July 23, 2012
Goals for the day:
____________________________________________________________________________________________________________________________________________________________________________
Day 10: July 24, 2012
Goals for the day:
- make materials list
- get list approved
- paper scaling
_____________________________________________________________________________________________________________________________________________
Day 11: July 25, 2012
Goals for the day:
_______________________________________________________________________________________________________________________________________________________
Day 15: July 31, 2012
_____________________________________________________________________________________________________________________________________________________________________
Day 18, August 3,2012
Goals for the day:
- write measurements for stairs
- cut wood with measurements
- put together stairs
_____________________________________________________________________________________________________________________________________________________________________
Day 19, August 6,2012
Goals for the day:
- cut sides of stairs
- figure out how to fix gaps in the stairs
_____________________________________________________________________________________________________________________________________________________________________
Day 22, August 9,2012
Goals for the day:
- cut wood needed for the back to support the stairs
- make sure that the bottom of the stairs if touching the floor
- put together the rest of the stairs (ask Colon or David for help)
____________________________________________________________________________________________________________________________________________________________
Day 23: August 11, 2012
Goals for the day:
- finish up building stairs

_____________________________________________________________________________________________________________________________________________________________
Day 24: August 13,2012
Goals for the day:
- drill holes for the led lights
- attempt to program he lights
-______________________________________________________________________________________________________________________________________________________________________________________________________
August 14, 2012
Goals for the day
- figure out the size the holes for the LED lights need to be.
- FInd a carpet place to donate us some carpet to hide the pressure sensors.
- get speakers and figure out where to put them.
- figure out the wiring get batteries.
 " target="">
Question Section:
- can we program sound with Modkit? Yes.
- how to connect pressure sensing and lights using Modkit at the same time?
- outlet cord connected to the wall using Modkit?
_______________________________________________________________________________________________________________________________________________________________________________________________
Technologies:
- fablab - We used to Fab lab to create our prototype press fit staircase.
- gimp- On our final stair case we can use gimp to make it more artistic.
- modkit/arduino - Our sound and LED lights are programmed with Modkit/ Arduino.
_______________________________________________________________________________________________________________________________________________________________________________________________
Citations:
This link has instructions showing how to program arduino boards and how to make them work for different projects. It also describes how to power the boards.
This link is a basic outlook on what we want our final project to look like at the end. At night this project will come into play, when a person is going ip the stairs at night it will light up the first flight of stairs. When the person gets off the first flight of stairs the stairs they just came off of will automatically turn off, and the next flight of stairs will light up until they have finally reached their destination.
This link is more applicable and beneficial for our other target area people that are blind but they're able to hear the music to go up to the next stair. This will help the blind to become much more independent, not only is this helpful for the blind but it is also very entertaining for little children.
This link is showing us how to build a staircase
basic set up on how to build the stairs

Comments (3)
David solomon said
at 10:19 am on Jul 14, 2012
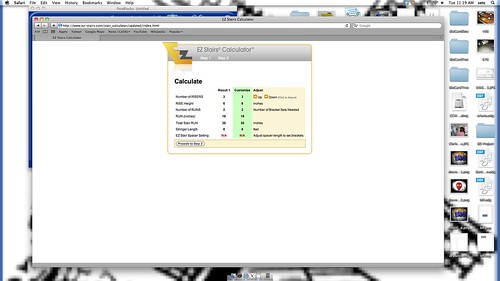
http://daveosborne.com/dave/articles/stair-calculator.php (will help to calculate material needed and stairs calculations)
http://www.instructables.com/id/How-to-Build-Stairs/?ALLSTEPS (will help with the design process)
David solomon said
at 5:41 pm on Jul 15, 2012
http://davethehowtoguy.com/149/choosing-the-right-wood-for-your-stairs/ (possible wood that you can use to build your final stairs)
Donna Parker said
at 4:06 pm on Jul 16, 2012
If a car is needed to pick up the wood, let me know I can help
You don't have permission to comment on this page.